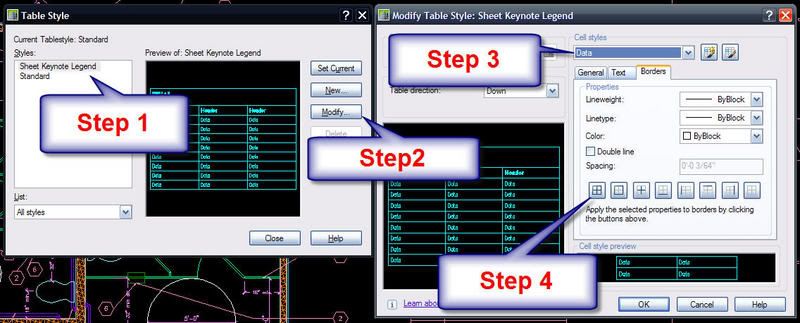
To allow all lines of the table style to print, you will need to modify the table style. Please reference the image below the steps.
Go to the menu Format and choose Table Styles…
- For step 1, select the Sheet Keynote Legend table style.
- For step 2, click the modify button.
- For step 3, select the appropriate component of the table in the drop down list.
- For step 4, click the borders tab and click the button to give all cell edges border lines.
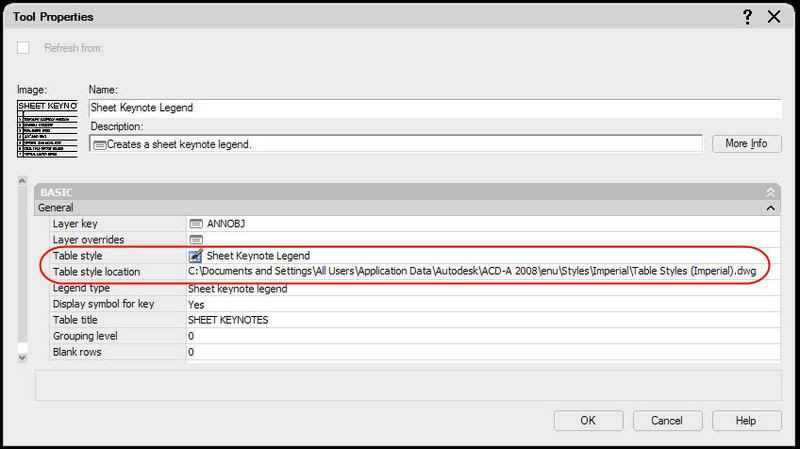
The follow up question to the solution above was: "Is there a way to change the style permanently so I won’t have to go through this every time?"
Right click the Sheet Keynote Legend tool on your tool palette that you are using and choose properties. Refer to the highlighted path in the image below. Browse to your file and setup the table style in that file to use the settings you want. Please keep in mind that just like any other AutoCAD drawing, once a style is defined in a drawing, it will need to be re-defined to use the new settings. I would recommend using Design Center to update the table styles being used in existing drawings.


No comments:
Post a Comment